ExTra: The Expenses Tracker
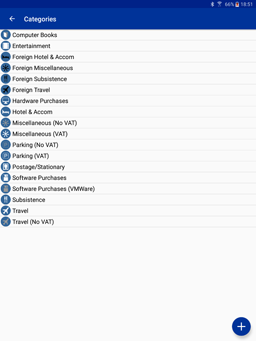
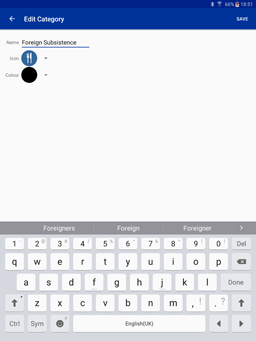
Configuring Categories New categories are added using the add button add at the bottom-right of the screen. This will take you to the Add Category screen. Tap a category to edit it. This will open a similar screen to that used to enter new categories and allow you to change the details of the category.
Name - The name for the category. This can be reported in submitted sheets if required. Icon - The icon to display for expense items in this category. These are only displayed by ExTra and at the moment, you can only select from ExTra's built-in icons. Colour - The colour in which to display the icon symbol. Colour can be used to convey meaning, for example, to distinguish between local and foreign travel, or different VAT rates.
|
|||||||||
|
|
||||||||
|
|
||||||||
 Categories allow you to group expenses together for accounting or VAT purposes
and are fully customizable. For each category, you can define a name and
icon. The colour of the icon can also be customized. For convenience, ExTra
comes with a pre-configured set of categories, but you are free to delete or
rename these as you wish.
 To remove a category, press and hold on the category entry until the screen
changes to remove mode. Multiple categories can be selected for removal by
tapping on them. When you have finished selecting categories, tap the dustbin
icon delete in the
top-right to remove them. Press the back button to cancel.